Where to start when it comes to monetizing mobile applications? Finding effective ways to generate revenue from their creations is a must for developers. And one powerful tool in this arsenal is Flutter. Leveraging Flutter's capabilities for in-app purchases can be a game-changer for developers seeking to monetize their apps effectively.
This guide delves into the realm of Flutter in-app purchases, exploring integration, implementation, and best practices to help developers maximize their app's revenue potential.
Why Are In-App Purchases Important?
In-app purchases are an essential feature for many mobile apps and games, playing a critical role in modern app monetization strategies. Here’s why they are so important:
- Revenue Generation: Flutter, iOS, and Android in app purchase functionality provides a direct revenue stream for developers. Instead of relying solely on upfront app sales or advertisements, developers can offer additional content or features for a fee. This model can be particularly lucrative in free-to-play games, where users can download the game for free but pay for enhancements, virtual goods, or other in-game assets.
- Enhanced User Experience: In-app purchases allow users to customize their experience according to their preferences and willingness to spend. For example, users can buy aesthetic upgrades through in app purchase Android, such as themes or skins, or practical enhancements, like ad removal, which can make the app more enjoyable and personal.
- Long-Term Engagement: By offering incremental upgrades or new content over time, in-app purchases can keep the user engaged with the app long after the initial download. To enhance user engagement and monetization, implementing an in-app purchase Google Play (and through other platforms) is a strategic move for app developers. This can be especially effective in games, where new levels, characters, or challenges can be unlocked through purchases.
- Flexibility for Users: In-app purchase Android, or iOS, or Flutter give users the flexibility to access premium features without needing to pay for a full version of an app. This can attract a broader audience, including those who might not be willing to make a significant upfront investment.
- Market Expansion: They allow developers to reach diverse markets where users might have different spending capabilities. For instance, while some users may spend on high-priced items or bundles, others might prefer smaller, more frequent purchases.
- Data Insights: Purchases within an app can provide valuable insights into user preferences and behaviors. Developers can analyze data from iOS or Android in app purchase, to understand what appeals to their users, which can inform future development and marketing strategies.
In-app purchases are crucial for developers as they offer a scalable revenue model while enhancing user experience and engagement. They also provide valuable data that can help tailor the app’s offerings to better meet the needs of its users.
How To Integrate In-App Purchase Into Application
Step 1. Launch Configuration
Initially, it's essential to configure our products—these can range from subscriptions to individual items—that will be made accessible for purchase within the app through the AppStoreConnect console and in app purchase Google Play Market. (We won't delve into this further, as the options in these consoles offer ample flexibility and can accommodate nearly any scenario. Hence, tailoring subscriptions or individual product settings should align with your specific needs.)
Step 2. Incorporate Support
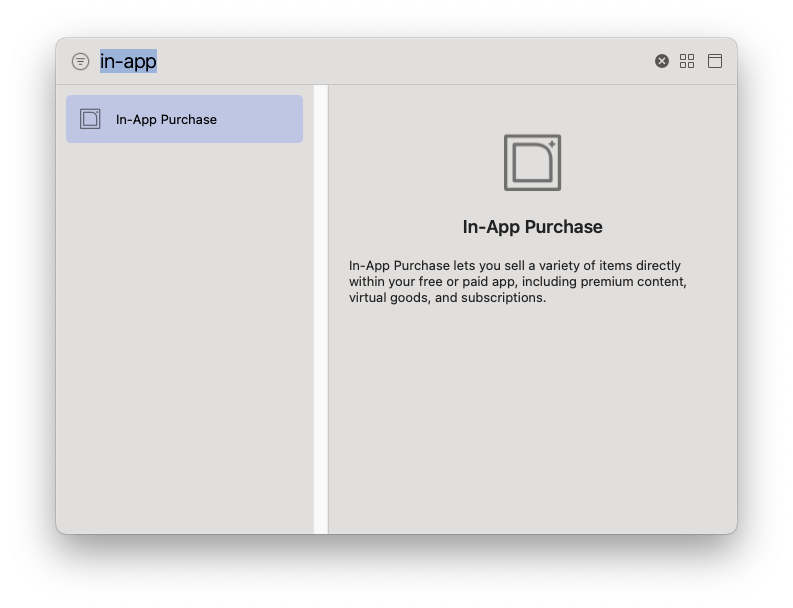
Next, navigate to XCode -> Runner -> Signing & Capabilities -> + (plus) to incorporate support for in-app purchases into your project:

Step 3. Connect Plugin
In the following steps of the in app purchase tutorial, we will use this plugin: https://pub.dev/packages/in_app_purchase
This plugin supports in-app purchases through an underlying store, which can be the App Store (on iOS and macOS) or Google Play (for Google in-app purchase Android).
To connect this plugin, you should open pubspec.yaml and in the dependencies and dev_dependencies section. Add the dependency of this plugin like this:
dependencies:
 flutter:
   sdk: flutter


 in_app_purchase: ^3.1.13
 flutter_bloc: ^8.1.3
 freezed_annotation: ^2.4.1
 ...


dev_dependencies:
 flutter_test:
   sdk: flutter


 freezed: ^2.5.2
 ...
We have also added dependencies for BLoC and Freezed packages as we will be using a modern approach to implementing In-App Purchase.
Product Discovery Lab
Free product discovery workshop to clarify your software idea, define requirements, and outline the scope of work. Request for free now.


Step 4. Create BLoC
Well, let's now create our BLoC in which all our logic for In-App Purchase will be implemented.
To begin with, we will implement a State with two fields. The first field will be status. With the help of this field, we will change our View depending on the needs. For example, when we have a status like loading, we will show the loader, and when we have a status like success, we will show a list of products.
enum IAPStatus { initial, loading, success, failure }


@freezed
class IAPState with _$IAPState {
 const factory IAPState({
   @Default(IAPStatus.initial) IAPStatus status,
   @Default([]) List<ProductDetails> productOfStore
 }) = _Initial;
}
Now that we have State, we need to implement the Events collection. We will need two events: getProductsByIds and purchaseProduct.
enum IAPTypeProduct { renewal, nonRenewal }

@freezed
class IAPEvent with _$IAPEvent {
 const factory IAPEvent.getProductsByIds(
  Set<String> ids,
 ) = _GetProductsByIds;
 const factory IAPEvent.purchaseProduct(
   ProductDetails product,
   IAPTypeProduct type,
 ) = _PurchaseProduct;
}
Well, now that we have both State and Events we can get down to the fun part, which is implementing our BLoC logic for In-App Purchase. Let's take a look at this logic and break it down step by step.
Our BLoC class will have three public methods that will be exposed in our View.
Using the getProductsByIds method, we will retrieve our products that will be available to the user for purchase. As we can see, we have created a unique list of data that represents the product IDs. We will need this data to get exactly those products specified in the list.
Also, as we can see throughout this in app purchase tutorial, we have methods like purchaseProductRenewal and purchaseProductNonRenewal, these methods will serve us so that we can request the purchase of a renewing product or a non-renewing product (i.e. subscription or non-subscription).
extension IAPBlocExt on IAPBloc {
 /// Public user methodes
 void getProductsByIds() {
   final ids = <String>{
     'premium_30_days',
     'premium_60_days',
     'premium_90_days',
   };


   add(_GetProductsByIds(ids));
 }


 void purchaseProductRenewal(ProductDetails product) {
   add(_PurchaseProduct(product, IAPTypeProduct.renewal));
 }


 void purchaseProductNonRenewal(ProductDetails product) {
   add(_PurchaseProduct(product, IAPTypeProduct.nonRenewal));
 }
}
Well, now let's take a look at our BLoC. As we can see, we are handling our getProductsByIds and purchaseProduct events.
class IAPBloc extends Bloc<IAPEvent, IAPState> {
 IAPBloc() : super(const _Initial()) {
   _listeningPurchase();


   on<IAPEvent>(_onIAPHandler);
 }


 /// Handler for events
 Future<void> _onIAPHandler(IAPEvent event, Emitter<IAPState> emit) async {
   await event.map(
     getProductsByIds: (event) => _onGetProductsByIds(event, emit),
     purchaseProduct: (event) => _onPurchaseProduct(event, emit),
   );
 }


 // ...
}
Now let's look at how these events are handled in more detail. First, we will look at the _onGetProductsByIds handler that allows us to get the available products that we are requesting.
Future<void> _onGetProductsByIds(
 _GetProductsByIds event,
 Emitter<IAPState> emit,
) async {
 final items = await InAppPurchase.instance.queryProductDetails(event.ids);


 emit(state.copyWith(
   status: IAPStatus.success,
   productOfStore: items,
 ));
}
As we can see, the event handler for getting products looks very simple. All we do in this handler is query the AppStore or Google in-app purchase Android for products and add them to our state.
Now, let's look at another handler _onPurchaseProduct that we use to make a purchase request.
Important note: You also need to complete all previous transactions for the iOS system, if any. As you can see, this is exactly what we do in the _finishedPreviewsTransactions method.
Future<void> _onPurchaseProduct(
 _PurchaseProduct event,
 Emitter<IAPState> emit,
) async {
 emit(state.copyWith(status: IAPStatus.loading));


 if (Platform.isIOS) _finishedPreviewsTransactions();


 try {
   final product = event.product;
   final purchaseParam = PurchaseParam(productDetails: product);
   final purchaseType = event.type;


   if (purchaseType == IAPTypeProduct.renewal) {
     await InAppPurchase.instance.buyConsumable(
       purchaseParam: purchaseParam
     );
   } else {
     await InAppPurchase.instance.buyNonConsumable(
       purchaseParam: purchaseParam
     );
   }


   emit(state.copyWith(status: IAPStatus.success));
 } on PlatformException catch (ex) {
   emit(state.copyWith(status: IAPStatus.failure));
 }
}


Future<void> _finishedPreviewsTransactions() async {
 var transactions = await SKPaymentQueueWrapper().transactions();
 for (var skPaymentTransactionWrapper in transactions) {
   SKPaymentQueueWrapper().finishTransaction(skPaymentTransactionWrapper);
 }
}
As we can see in this in app purchase tutorial, the handler responsible for creating the purchase request is also very simple, all we do is get ProductDetails and create the PurchaseParam object with which we will work. Our next step will be to check the request type, it can be renewal or nonRenewal, depending on this type, we will call the method we need from the InAppPurchase class, that is, for the renewal type, we will call the buyConsumable method, and for the nonRenewal type, we will call the buyNonConsumable method.
The buyConsumable and buyNonConsumable methods will call a modal window from your OS that will allow you to purchase the product.
Well, now you probably have a question, how to process the result for the in app purchase? Everything is quite simple, the in_app_purchase plugin provides us with a listener that will listen to events that occur during a transaction.
This is how our listener will look like, which will process transaction events. Depending on the status of the transaction, you can trigger the behavior that will correspond to your flow. This listener should be initialized as soon as our BLoC class is initialized.
Future<void> _listeningPurchase() async {
 InAppPurchase.instance.purchaseStream.listen(
   (events) {
     Future.forEach(events, (purchaseDetails) async {
       if (purchaseDetails.pendingCompletePurchase) {
         log('PENDING-COMPLETE-PURCHASE', name: 'IN-APP-PURCHASE');
	   // ...
   await InAppPurchase.instance.completePurchase(purchaseDetails);
       }


       switch (purchaseDetails.status) {
         case PurchaseStatus.pending:
           log('PENDING', name: 'IN-APP-PURCHASE');
         case PurchaseStatus.purchased:
           log('PURCHASED', name: 'IN-APP-PURCHASE');
         case PurchaseStatus.error:
           log('ERROR', name: 'IN-APP-PURCHASE');
         case PurchaseStatus.restored:
           log('RESTORED', name: 'IN-APP-PURCHASE');
         case PurchaseStatus.canceled:
           log('CANCELED', name: 'IN-APP-PURCHASE');
       }
     });
   },
   onDone: () {
     log('DONE, name: 'IN-APP-PURCHASE');
   },
   onError: (error) {
     log(error.toString(), name: 'IN-APP-PURCHASE');
   },
 );
}
In this blog post, we covered the implementation of In-App Purchases on a mobile client written in Flutter. However, for in-app purchases to operate fully and securely, you will also need to implement a backend part that will implement the behavior for checking and confirming payments in the AppStore.
Conclusion
If you are just at the beginning of the project and are wondering how you can use In-App Purchase in a nice and concise way and, most importantly, professionally, then we recommend that you look at the connection of this type of monetization with the BLoC architecture and the Freezed code generator. In this case, your code will be easy to maintain and fast. This approach combines two good solutions at once, the clean and concise BLoC architecture and the Freezed code generator, which makes our code even better and can easily connect plugins such as In-App Purchase.
At Axon, we understand the vital role that in-app purchases play in the success of mobile apps and games. Integrating these systems can be complex, requiring careful consideration of user experience, security, and seamless functionality. That's why we offer specialized software engineering services (going far beyond in-app purchase Android, iOS, and Flutter) tailored to help you implement effective in-app purchase systems effortlessly. Contact us today to get a detailed consultation on your project!


