Need estimation?
Leave your contacts and get clear and realistic estimations in the next 24 hours.

Table of contentS
Just to be clear about that, any version of Symfony framework is suitable for our purposes, but now let’s be specific and try to install exactly the version 3.4
$ composer create-project symfony/framework-standard-edition my_api "3.4.*"
The command above helps us not only to install the Symfony dependency and its interdependencies, but it also creates the base project with directories structure, base configuration, bundles and front controllers.
It is enough to go to the project directory and to run our code to ensure ourselves that everything is already there and working. Let’s run the command:
$ php bin/console server:run
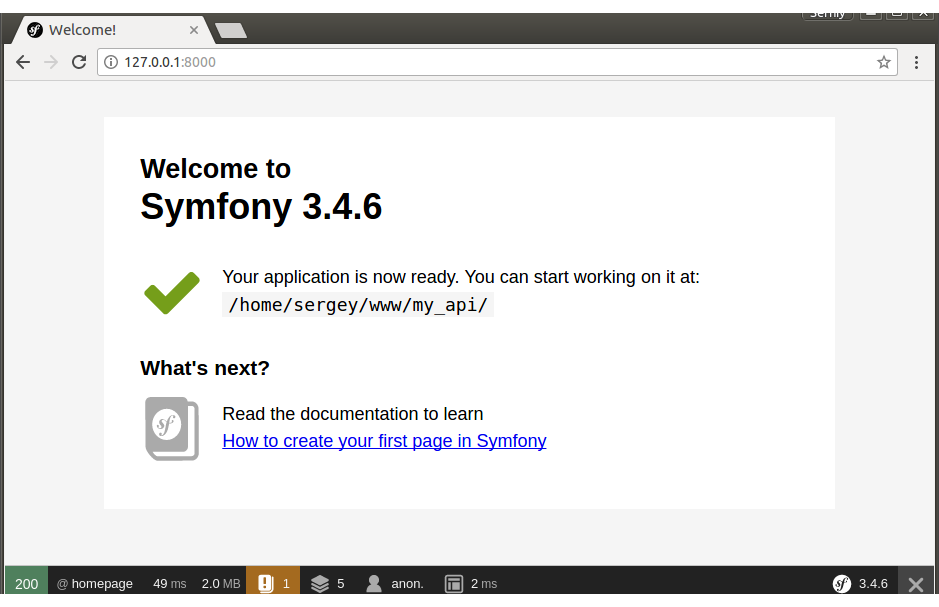
and then open http://127.0.0.1:8000 in browser:

On a page, there is a greetings text and the debugger line at the bottom. On that stage already we are capable to provide the changes and to see their impact on the outcome. If we go further and dive into the details, there are tons of useful debugging information available to us.
Let’s also talk shortly about folders and files.
There is a ./web directory and inside of it, there are app.php and app_dev.php. That is the pair of the front controllers for our application, former is used for production and later - for development. One of the biggest difference between them is that latter has the debugger.
If we look inside of any of them, we’ll see:
"require __DIR__.'/../vendor/autoload.php';"
That is the way the dependencies, configured through the composer, become available to our application.
Also, it is worth to pay attention to ./app/config directory. There is the huge amount of configuration parameters, which are required for our application and specifically for multiple components to run. That is the place, where we’ll put our own parameters as well.
The directories review wouldn’t be complete if we avoid talking about ./src directory. That is the directory, where the default AppBundle is created for us. It’s fair to stress that single bundle is enough for small applications, moderate and big projects require multiple bundles to be defined.
Of course we have to deal with MVC (Model-View-Controller) paradigm in our application, that is a de-facto standard approach while developing the application with user interface.
As such let’s create our first API controller.
namespace AppBundle\Controller;
use Sensio\Bundle\FrameworkExtraBundle\Configuration\Route;
use Sensio\Bundle\FrameworkExtraBundle\Configuration\Method;
use Symfony\Component\HttpFoundation\JsonResponse;
use Symfony\Bundle\FrameworkBundle\Controller\Controller;
/**
* Class UserApiController
* @Route("/api/users")
*/
class UserController extends Controller
{
	/**
  * @Route("", name="api-users")
  * @Method({"GET"})
  * @return JsonResponse
  */
  public function listAction()
  {
  	$users = [
    	['name' => 'John', 'email' => 'john@example.com'],
    	['name' => 'Jane', 'email' => 'jane@example.com']
    ];
    return new JsonResponse($users);
   }
}
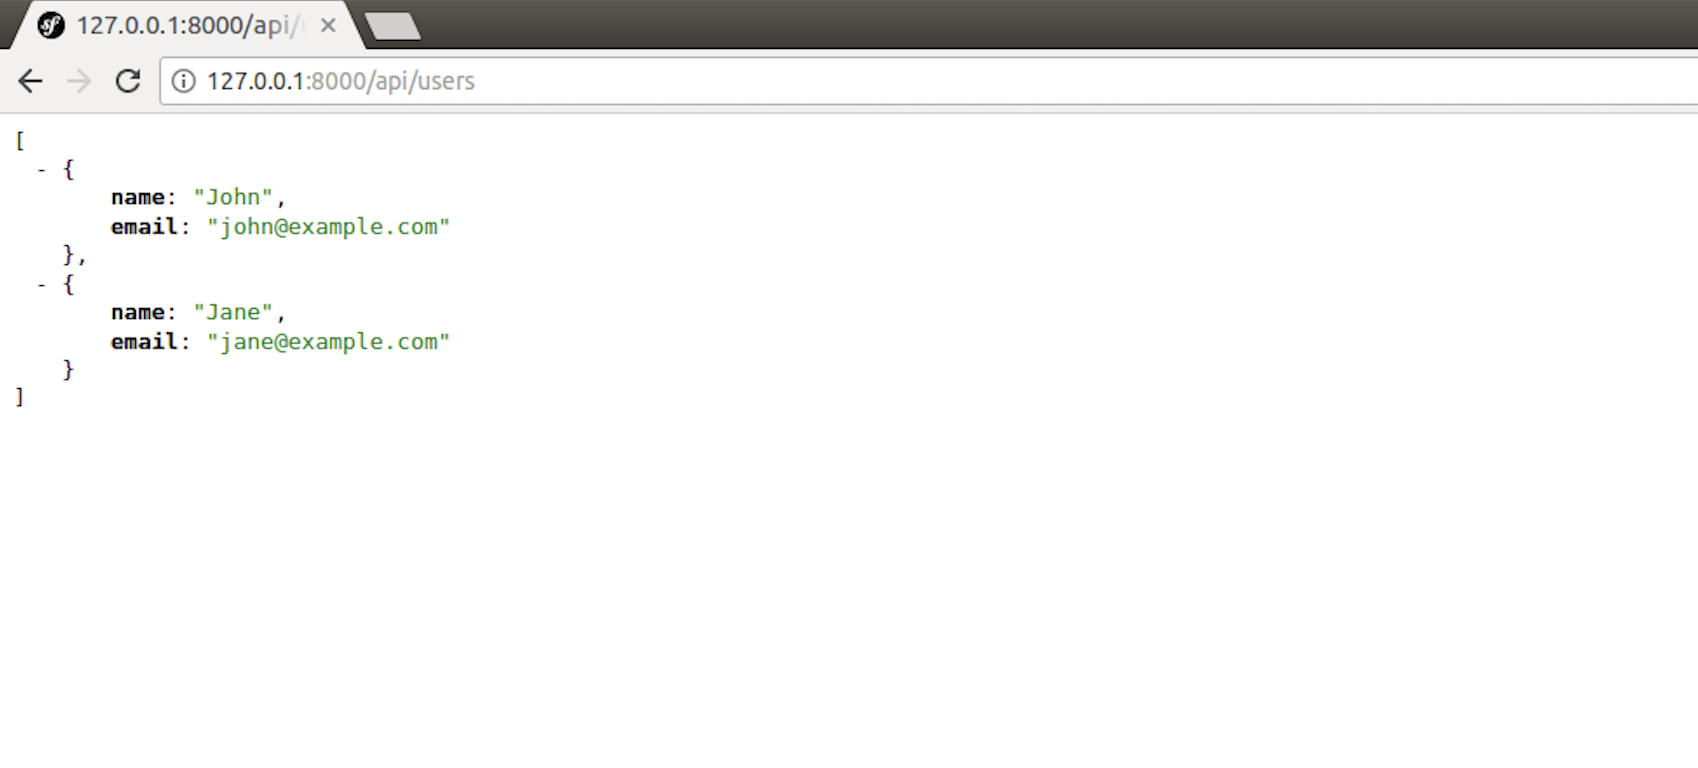
and let’s see, how it works, when we call it using browser http://127.0.0.1:8000/api/users:

Everything is quite similar to what is available there in other languages and other frameworks, but which are the most interesting here - those are annotations. Let’s take a closer look:
/
* @Route("", name="api-users")
	* @Method({"GET"})
	* @return JsonResponse
*/
for people not familiar with PHP the annotations above may look like comments and … those people are absolutely right, these are comments. But these are special, as the comments are available through the reflection.
As such, before the controller is called, there is analysis of the comment being happened and if there is the known construction found in that comment then the corresponding rule applies. The mechanism is easy enough and we’ll have a chance to understand it in our next post.
As for now it is important to remember, that @Route annotation is used for path construction and @Method limits the access to the controller using the HTTP method specified.
Moreover, if we add the annotations, which don’t have the corresponding handler, then nothing is going to happen, no handler is going to handle them.
So far we have the working controller, that returns hardcoded data. As such now is a time to move forward and to introduce some real data to our application. To do that, let’s create couple models and see how it works.
There are multiple options available for us to create a model:
1. Using IDE and manual approach, where model files are to be created by us
2. There is a nice console command available that helps us create those models using the interactive mode or by providing the command line options
$ php bin/console generate:doctrine:entity
3. There is also the possibility to generate models from existing tables in database
As such, choose your favorite approach and let’s create two models:
./src/AppBundle/Entity/User.php
./src/AppBundle/Entiti/Role.php
The User model then looks like:
namespace AppBundle\Entity;
use Doctrine\ORM\Mapping as ORM;
use Doctrine\Common\Collections\ArrayCollection;
/**
* @ORM\Table(name="`user`")
* @ORM\Entity
*/
class User
{
/**
* @ORM\Column(type="integer")
* @ORM\Id
* @ORM\GeneratedValue(strategy="AUTO")
*/
private $id;
/**
* @var string $email
* @ORM\Column(type="string", unique=true)
*/
private $email;
/**
* @var string $name
* @ORM\Column(type="string", length=255, nullable=true)
*/
private $name;
/**
* @ORM\ManyToMany(targetEntity="Role", fetch="EAGER", cascade={"persist"})
* @ORM\JoinTable(name="user_role",
*      joinColumns={@ORM\JoinColumn(name="user_id", referencedColumnName="id")},
*      inverseJoinColumns={@ORM\JoinColumn(name="role_id",
referencedColumnName="id")}
*      )
*/
private $roles;
public function __construct()
{
	$this->roles = new ArrayCollection();
}
/**
* @return int
*/
public function getId(): int
{
	return $this->id;
}
// ...
/**
* @return ArrayCollection
*/
public function getRoles()
{
	return $this->roles;
}
/**
* @param Role $role
*
* @return User
*/
public function addRole(Role $role)
{
	$this->roles->add($role);
	return $this;
}
/**
* @param Role $role
*
* @return User
*/
public function removeRole(Role $role)
{
	$this->roles->removeElement($role);
  return $this;
}
}
The code snippet above among others has the doctrine annotations. Let’s take a closer look at doctrine’s ManyToMany annotation. That’s the declaration of the relationship to another one model - Role. The relationship is many to many, in other words one role relates to multiple users and one user relates to multiple roles. Physically, except the user and role tables there is another one table present in database - user_role - that describes the many to many relationship.
As soon as we decide to reflect the code on the database, there is the command available. Everything we should do is to run the command:
$ php bin/console doctrine:schema:update
After we created the entities, we can now enhance our controller to return the data. But the idea to go to the database directly from the controller doesn’t looks like the good idea.
Controller has its own responsibility and it is the handling of user actions by receiving the http request and providing the http response.
And when we decide to work with the database and process the data according the business logic prior returning the result to the user, then we should create a service, that is dedicated to move the complexity out of the controller.
Let’s create the service with the business logic:
./src/AppBundle/Service/UserService.php
namespace AppBundle\Service;
use AppBundle\Entity\User;
use Doctrine\ORM\EntityManagerInterface;
class UserService
{
private $em;
private $userRepo;
public function __construct(EntityManagerInterface $entityManager)
{
	$this->em = $entityManager;
  $this->userRepo = $this->em->getRepository(User::class);
}
/**
* @param $payload
* @return array
*/
public function list($payload)
{
	if (isset($payload['sort'])) {
  	if($payload['sort'] == 'name') {
    	return $this->userRepo->findBy([], [['name' => 'ASC']]);
    }
    if($payload['sort'] == 'email') {
    	return $this->userRepo->findBy([], [['email' => 'ASC']]);
    }
  }
  return $this->userRepo->findAll();
}
}
The service code is simple enough, there is just one method that returns all the users from the database and if the appropriate parameter is set, then the users list will be sorted as well.
Let’s now adjust the controller logic considering the service we just created above.
namespace AppBundle\Controller;
use Sensio\Bundle\FrameworkExtraBundle\Configuration\Route;
use Sensio\Bundle\FrameworkExtraBundle\Configuration\Method;
use Symfony\Component\HttpFoundation\JsonResponse;
use Symfony\Component\HttpFoundation\Request;
use Symfony\Bundle\FrameworkBundle\Controller\Controller;
use AppBundle\Service\UserService;
/**
* Class UserApiController
*
* @Route("/api/users")
*/
class UserController extends Controller
{
private $activityService;
public function __construct(UserService $activityService) {
	$this->activityService = $activityService;
}
/**
* @Route("", name="api-users")
* @Method({"GET"})
* @param Request $request
* @return JsonResponse
*/
public function listAction(Request $request)
{
  $sort = $request->query->get('sort');
  $users = $this->activityService->list($sort);
  $serialized = [];
  foreach ($users as $user) {
    $serialized[] = [
    'name' => $user->getName(),
    'email' => $user->getEmail(),
    ];
  }
  return new JsonResponse($serialized);
}
}
It’s important to understand couple of features provided by Symfony to the developers.
At first, we see that our service is provided as a parameter to the controller’s constructor. Considering the fact, that we don’t instantiate the controller and do not provide our service instance to it, there is the reasonable question, how does it happen, how does the controller get the reference to our service? And the answer is easy enough, that’s Symfony that gives us all of that through the autowiring and dependency injection.
The same applies to the listAction method and the $request parameter supplied. At some point we decided that we need the actual http request object in our method, so we declare that through the method signature and Symfony then satisfies our demand.
Another topic to touch is serialization. In order to return the list of users (objects), those have to be serialized to json. There are multiple implementations dedicated to provide the serialization functionality and we can use those or even create our own custom serializer, opportunities are limited just by our imagination.
At this point our controller is ready, as by the user action controller propagates the request to the business layer (UserService), where the latter calls the database through the persistency later (Doctrine ORM).
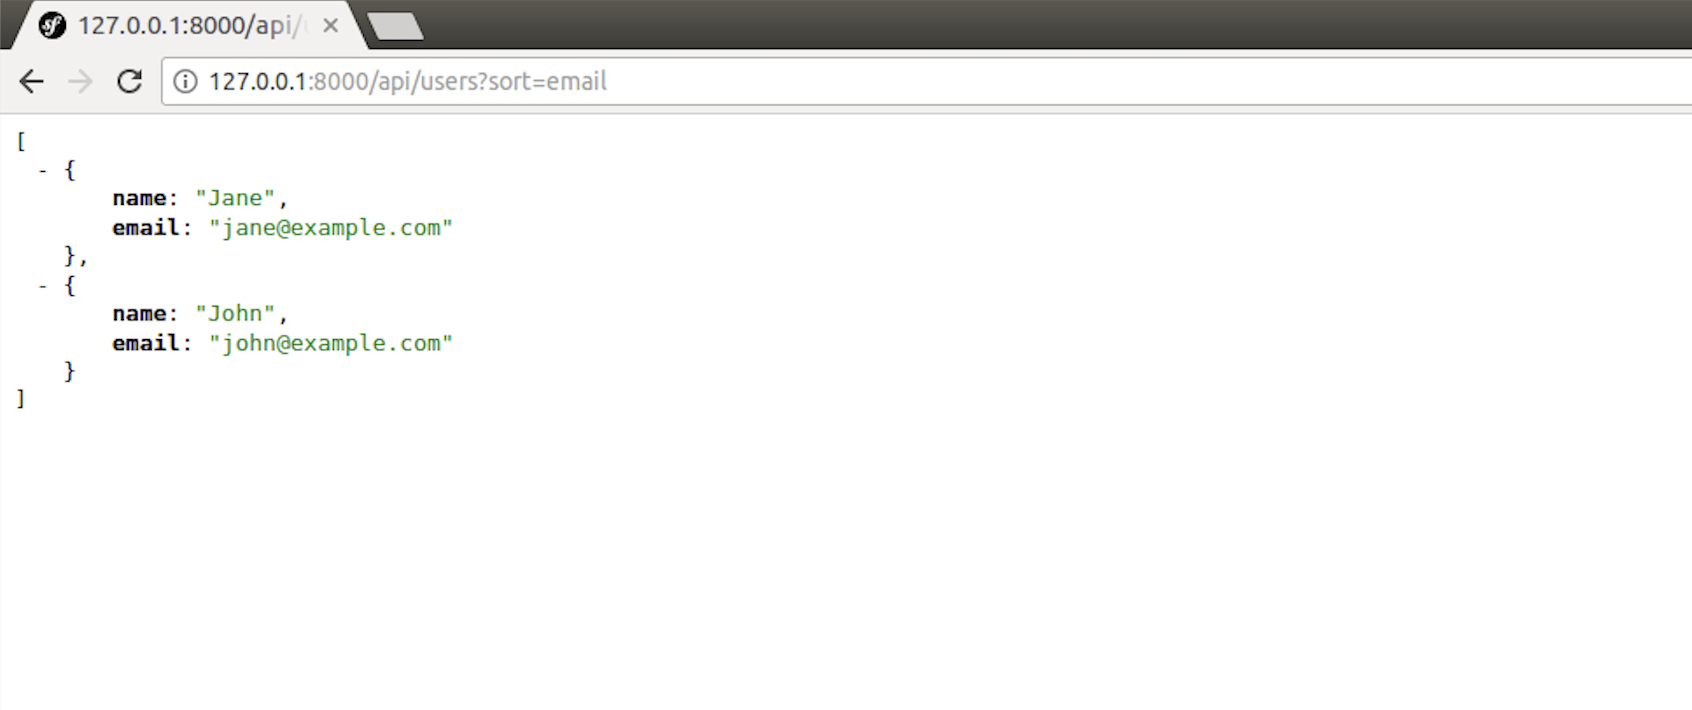
Let’s call the REST service http://127.0.0.1:8000/api/users?sort=email and inspect the result:

As expected, the response is returned in form of json and the records themselves are sorted by email. Great job!
The theme in this article is broad enough, we hope that our attempts to shed a light on what is proposed to us by Symfony & Doctrine frameworks was helpful to you. If later you consider the discussed technologies as the part of your technology stack, then no doubts the goal of the article is achieved.
Next post from the series of posts is going to be dedicated to the question of security in PHP web development and how do we have to enhance our UserController to secure the call. Stay tuned!This is the second article from our custom software development series of posts dedicated to shed a light on modern web application development using PHP and Symfony web framework.Previous article was about such a helpful tool, as Composer. Using composer we tried to install Symfony as the dependency to our project.
Symfony automatically injects services into your controller constructors using its autowiring system. You don't need to manually instantiate services; Symfony's dependency injection container handles it, ensuring clean separation of concerns and easier testing.
Controllers are meant to handle HTTP requests and responses, not complex business logic. Moving database interactions and data processing into dedicated service classes keeps controllers clean, makes code easier to maintain, and allows better separation of concerns within the application.
In Symfony, annotations are special comments that the framework reads to define routing and HTTP method rules. For example, @Route sets the URL path for a controller action, and @Method restricts the action to specific HTTP methods like GET or POST. Symfony processes these annotations before calling the controller.
Free product discovery workshop to clarify your software idea, define requirements, and outline the scope of work. Request for free now.


[1]
[2]
Leave your contacts and get clear and realistic estimations in the next 24 hours.